Are There Any Dangers When Reconditioning Batteries?
While the process of reconditioning any kind of battery does not usually involve any kind of risks, there is one thing you will need to keep in mind: the liquid found in the cells of lead avid batteries is called Electrolyte and it can be extremely harmful. It is made of water and sulfuric acid and getting it on your skin by accident or sprinkling it into your eyes or on your clothes could cause severe issues.
Now that you know what are the main types of batteries that can be reconditioned and what are the main benefits and risks associated with the process, it is time to start learning some practical tips on how the reconditioning is done. We are going to take the example of a 12v car battery, one of the most common batteries to be reconditioned and explain the detailed steps of the process to you.
How To Recondition Batteries For Cars
To recondition a 12v car battery, you are going to need to use the following:
- a battery charges
- safety goggles
- neoprene gloves that can withstand working with chemicals
- a plastic funnel
- a flathead screwdriver
- an apron that will protect your clothe sin case of spilling some acid
- one gallon of distilled water
- one pound of baking soda
- a plastic bucket
- Epsom salt, half a pound to a pound
- something to record the voltage with, preferably a digital meter
You could also optionally include a battery post cleaner and a battery hydrometer on the same list.
Step 1 – Getting The Car Battery Ready To Be Reconditioned
Put on your gloves and safety goggles and keep them on the entire time to avoid any unfortunate accidents during the process.
Proceed by cleaning the battery posts also known as terminals form all the corrosion accumulated in time. You could use special battery post cleaner here, for a quicker solution, or make your own cleaner at home and use some brushes and obtain identical results. Use steel wool for cleaning the posts.
For the mix, use two tablespoons of baking soda and one tablespoon of water, blend it all in and obtain a runny paste you will need to apply using a toothbrush. Scrub the posts and see the solution forming foam all over. This in a clear indicator of the fact that your solution hast began to react and it is not effectively removing all traces of corrosion from the posts.
Provided you are dealing with a battery covered in a thick layer of corrosion on its terminals, use a brush made of steel wires to clean it or rely on grain sandpaper.
Next, get ready to clean the exterior of the battery using a paste made of baking soda and water. For this, you can use an older rag. Make sure you thoroughly wipe down the top and the area around the caps and the posts. Once these regions are finished, quickly test the battery’s voltage and proceed to recondition the battery.
Step 2 – Check The Voltage Of The Battery
Use a digital multi meter to see what the current voltage of the car battery is. These testers are affordable and simple to use and they are extremely useful for a number of jobs around the house, so they are definitely an investment worth making. Connect the device to the terminals of the car battery terminals in the right position and immediately receive information on the state of the battery.
If you notice the display says 12.6v+, you are looking at a battery that is in good shape, and its only problem might be corrosion accumulation on the posts. If you cannot see a voltage of at least 12.4v, you are looking at a car battery that requires some reconditioning work. If you notice 0 volts on display, the battery might have been short circuited and reconditioning it using this procedure might not to the trick.
Once you are clear about the information regarding the voltage, you will have a much clearer view whether you must recondition the battery or not. It is also a good idea to write down the voltage reading of the voltage so you can compare it with further readings in the future.
Step 3 – Empty The Battery Acid And Cleaning The Cells
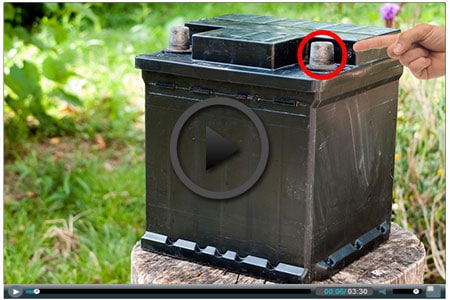
Remember to keep your goggles, gloves, and a set of old clothes or apron on so you can prevent battery acid from reaching your skin and burning you. Remove old traces of acid you can still see inside the cells of the car battery. Use a flathead screw driver to open the caps on the battery.
Their number may range from 2 to 6. If you do not notice nay caps, you are probably looking Sealed lead acid battery. To reach the interior and the caps, pry the plastic cover off the battery’s top and have them exposed. After removing all the caps, use a bucket for the leaking acid and keep some baking soda near you so in case you spill the acid, it will be used to neutralize the acid.
Take a look at each of the cells before emptying them and have them tested, as it will help you find out whether help the battery comes with a dead cell.
It is also possible to use a digital multi meter and engage the VDC mode; put the black minus probe on the minus terminal, dip the red + probe in the electrolyte and individually record all battery cell readings.
Make sure that all the cells display the same voltage value, whether it is 0.5 volts or higher. The voltage will automatically start to grow once you will start to work on it. If you notice 0 volts in any of the cells, the remain work may be all in vain, whereas seeing 0 volts could mean you are dealing with a short circuit or the desulfation of the battery.
Next, lean the battery away from yourself and inside the bucket and make sure not to spill any acid once you will start rolling it in the upside down position. Put the battery on the side when all cells are property emptied and take half a pound of baking soda and put it into the bucket so you can neutralize the acid and dispose of it in a safe manner.
Use a mix of distilled water and baking soda to clean the inside of the battery cells and use a funnel to pour the mix in every cell until they are properly filled. Shape the battery for about one minute and empty the cells into the bucket that contains baking soda and acid. Make sure no baking soda gets left behind in the cells.
Step 4- Battery Reconditioning
Refill the cells using new electrolytes made from Epsom salt and distilled water to restore the electrolyte and also to beef up the voltage. Use around 0.5 lb. Epsom salt and the same amount of distilled water that was previously boiled so the is properly dissolved.
Use the mixture to refill one cell after the other, then fill each cell in the funnel until you finally hit the level that indicates they are 100% filled. Put the caps back on and shake the battery around for up to two minutes. Take off the caps and charge the battery with the charger using a slow charge of12v/2amp. Charge for at least 24 hours and 36 hours for optimal results.
Use a battery load tester to test the battery or use the multi meter and place the battery under load so you can see the voltage that the battery has when placed under the load.